Connecting to the Yoda Network Disk on MacOS
1) Open Finder by clicking on the symbol you see below.

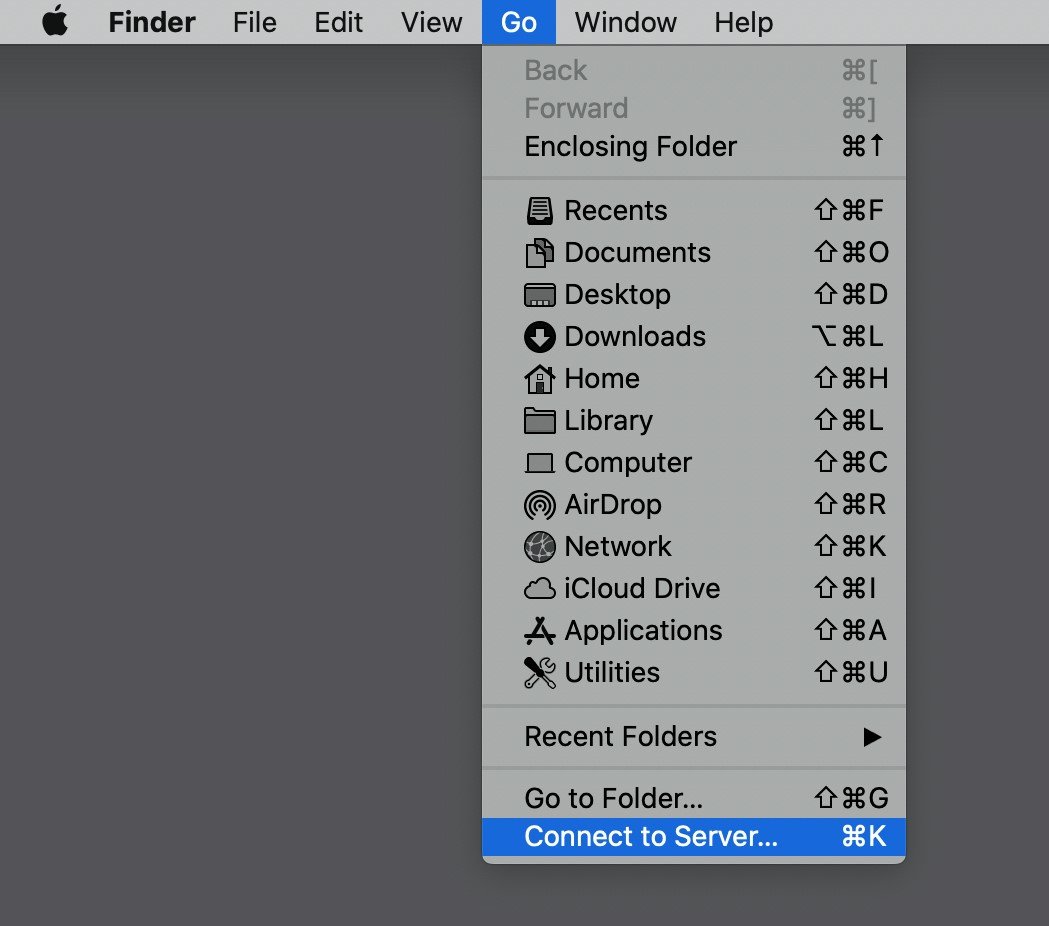
2) Click on ‘Go’ and choose ‘Connect to Server’.

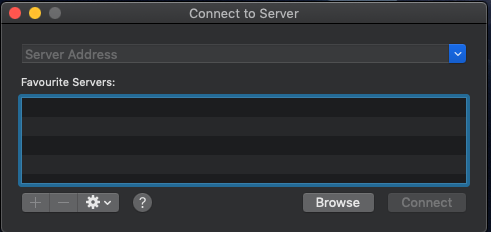
3) You should now see this dialog. Type the address of your Yoda environment.

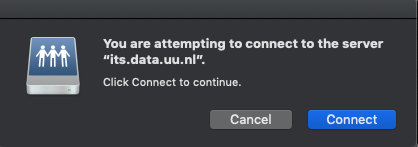
4) The Finder app will show a confirmation dialog, similar to the one below. The address shown in the dialog should be the address you entered in the previous dialog. Press the connect button.

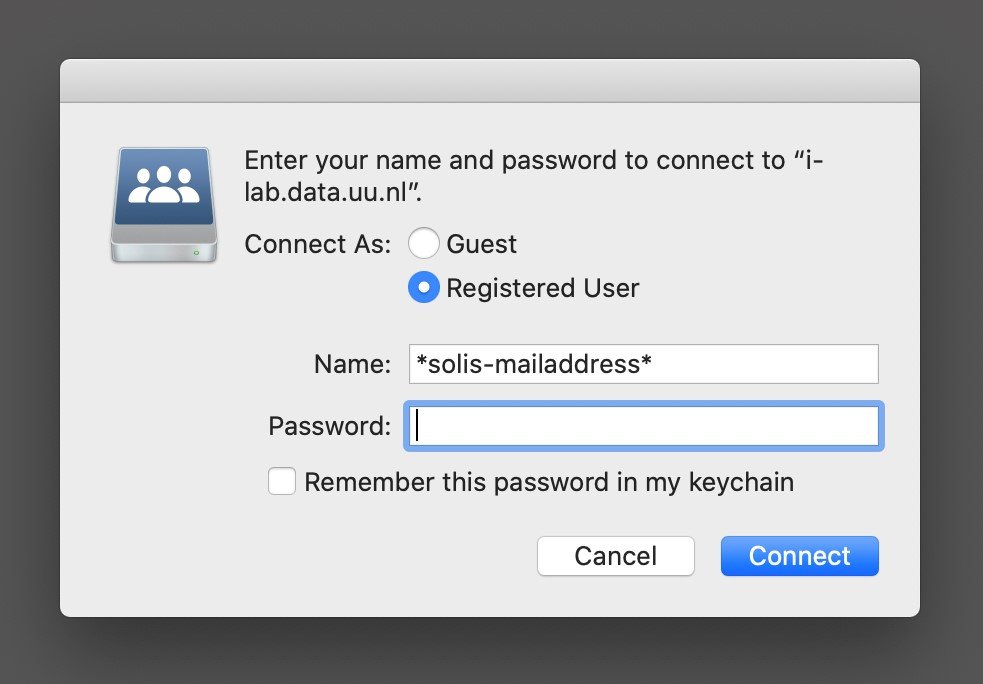
5) You should now see a credentials dialog. Click on ‘Registered user’. The user name is your email address (in lowercase) and your password is the Data Access Password you created (see Using Data Access Passwords). After you have logged in, you have access to your research group. Click on ‘Connect’.

6) You should now have a new Yoda network drive location in Finder. Its name is the network address you entered before. You may have to scroll down in Finder to see it. You can then click on this drive and place data in the research group (the main folder) that was created for you. When clicking on this drive, you can log in using your credentials.
